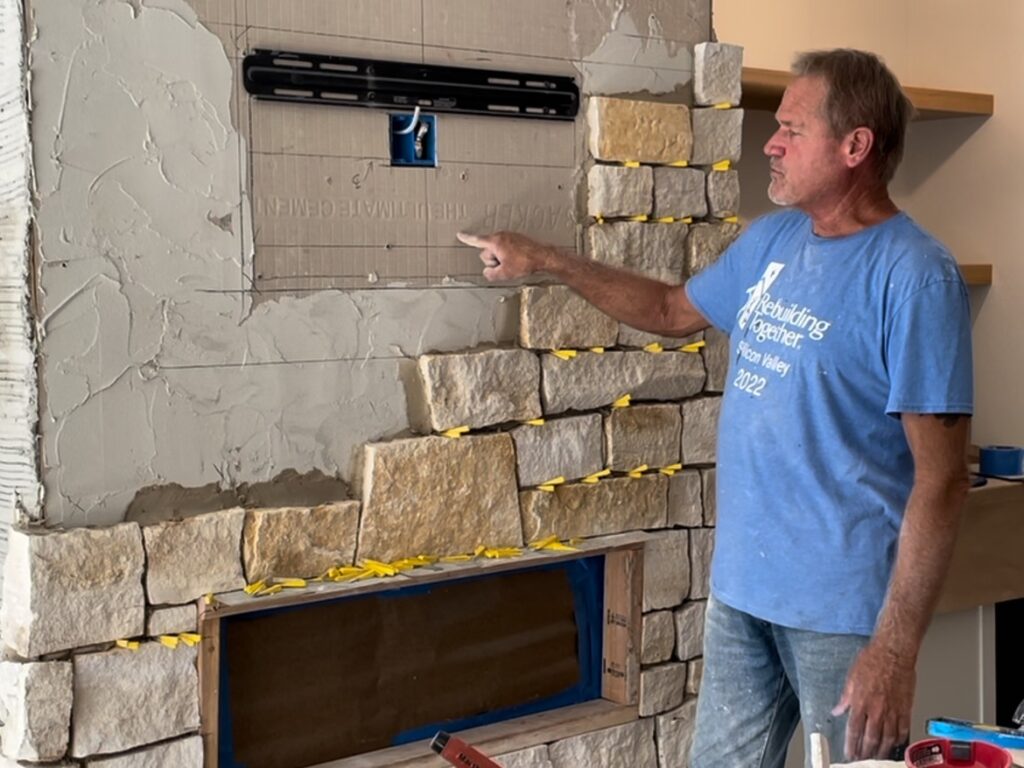
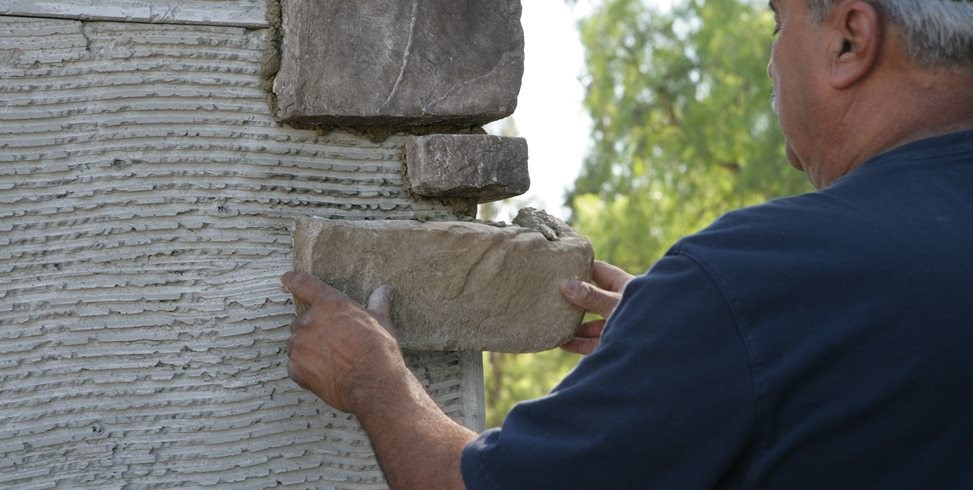
Have you ever seen a stonemason trowel mortar onto a stone veneer? He’d call it buttering and make it look as easy as buttering your morning toast. So perhaps after having watched a stonemason install natural stone thin stone veneer on the outside of your home you decide you’d like to go DIY for a small interior project?

Then you try buttering that first piece of veneer. Notice how surprised you feel when that mortar slips right off the trowel. Notice how it feels plopping on your shoe. Who knew mortar was so slippery? Before giving up and begging your stone mason for forgiveness, perhaps you might consider this brief tutorial on how to install stone veneer—all by yourself. And if you mess it up again, you can still call the mason. He’ll take your call. Promise.
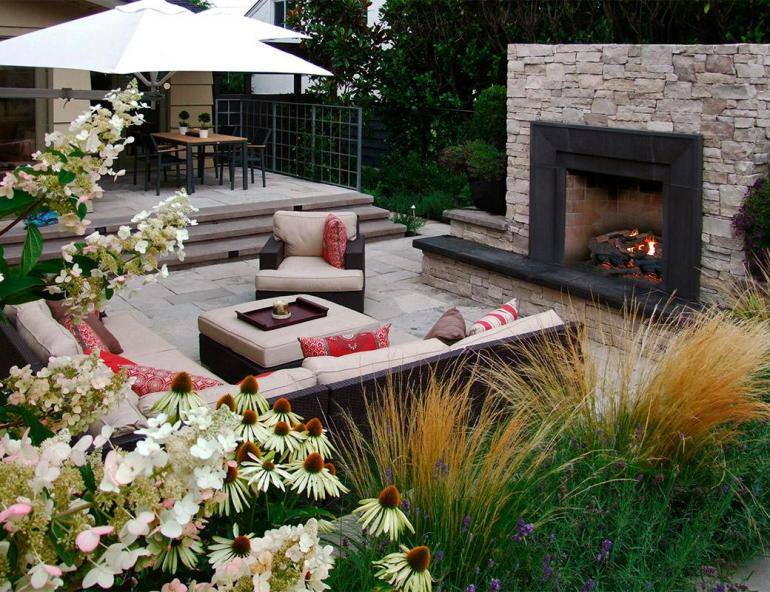
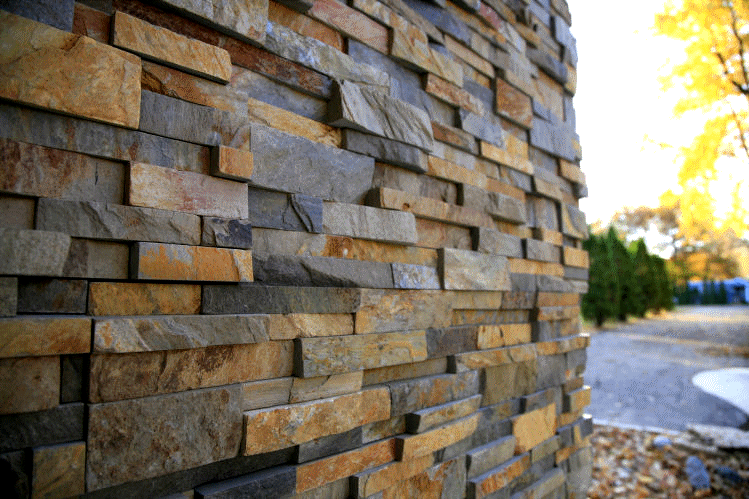
What is natural stone veneer? We’re using stone as a thin decorative covering for walls. Thin veneer is usually about an inch thick, give or take, and must weigh less than 15 pounds/sqft. For an easier installation, try using preassembled thin stone veneer panels.
How to prepare a wall for veneer? The latest method is to screw the cement board to the studs and tape the joints. Next, trowel a layer of thin set on the cement board. After the thin set hardens you can mortar on your veneer. The original method is to create a scratch coat with no cement board. You tack on two layers of tar paper over the studs and fasten chicken wire over the tar paper. Then apply a layer of stucco mix and rake it with something toothed to create horizontal furrows.
TIP: Keep in mind these preparatory steps may vary depending on your climate and local codes.
What mortar should I use? For beginners, it’s best to use premixed mortar purchased in sacks. Check the label to make sure you’re buying stone veneer mortar. If you have some experience under your belt, you might mix your mortar using cement, sand, and either lime or clay.
I’m ready to start. So, you have your wall prepped and your mortar mixed and you’re holding the first piece of Fond Du Lac thin stone. Do you feel that thin layer of powder on the back?
TIP: You don’t want to butter on that. Brush it off and wet the stone with a spray bottle.
Now scoop some mortar on your trowel and try to butter your stone with about a ¾” layer. It’s tricky. Keep practicing. And when you do get it buttered and you press the stone to the wall, try wiggling it slightly for better suction.
TIP: Make sure to trowel smooth any excess mortar on your wall. Always think about what kind of surface you’re leaving behind for your next stone. You may have to start over. You may have to tear down most of what you installed and cry and try again. Fear not. You’re on the right path.
Of course, when it comes to picking the right stone for your project you might need some help. And here at PBM, we’re happy to walk you through the options. Come visit us anytime.